Hello Orangescrummers! As per our commitment here we come with our latest product update. However, we have released the Bug & Issue Tracking feature.
Orangescrum is continuously bringing new updates that make it easier for you to manage your projects. We’ve got some major ones for you this time!
We’re always working on new updates to make Orangescrum even more convenient and bring you a great user experience. In our last update, we released the Profitability Report. And this time, we have some major updates for you!
Product Update: Bug & Issue Tracking
A bug is often a piece of code that does not work as expected. It may be that a feature or a specification supposed to enable a certain functionality has been coded incorrectly.
As a software engineer, it is your responsibility to identify and document these bugs so that they can be fixed and quality products can be delivered.
Bug tracking is one of the important aspects of a software development lifecycle to deliver quality products.
So, Having a robust defect management process improves the quality of software, which in turn improves the sustainability of the organization.
It also helps you to stay ahead of your competition, so you can book higher profits.
With Orangescrum Bug & Issue Tracking feature you can add every detail at your ongoing development projects.
To add bug details, just click on Bug Tracking at the left menu at Orangescrum. And click on “Create Bug”.
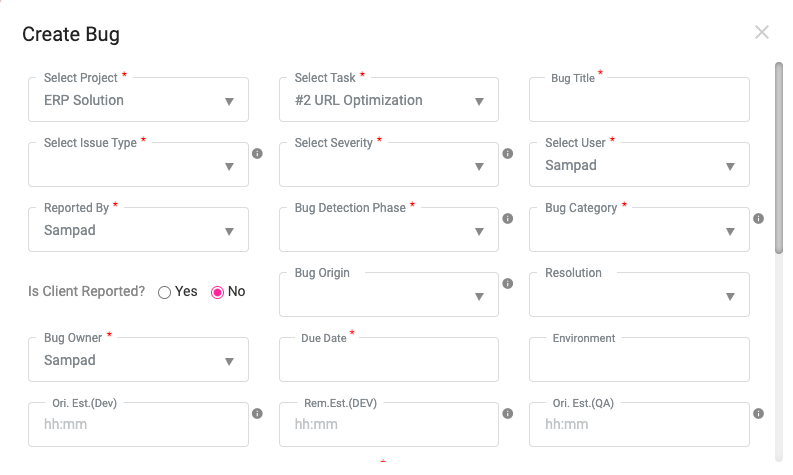

A Guide to Create a Bug Details in Orangescrum
Select Project – Select the project from the drop-down where you found the bug.
Select Task – Select the related task of that project at where you found the bug.
Bug Name – Name your Bug.
Select the Bug-type – The founded issue can be a bug, or a required improvement, or might be a query. So add your bug type accordingly.
Select Bug Severity – Select the Bug Severity.
Reported by – Select the user who has reported the bug.
Bug Detection Phase – In case the task is in the development phase or in the designing phase, Add the bug detection phase accordingly.
Bug Category – Select the Bug Category.
Select Client – Select if the Client has reported this bug or not.
The Bug Origin – Put the origin of this bug, as it could be from Designing origin, or Development origin, etc.
Resolution – Users need to add the required resolution for the bug.
Bug Owner – You can select a user as bug owner where the selected user is able to monitor all bug handling activities.
Due Date – Add the estimated due date to resolve the bug issue.
Environment – Select the bug environment like operating system, browser, device, etc.
Impacted Area – Add the details where the found bug has made the maximum impact.
Description – Add the detailed bug information to the description field.
Attachment – Add the bug-related attachments.
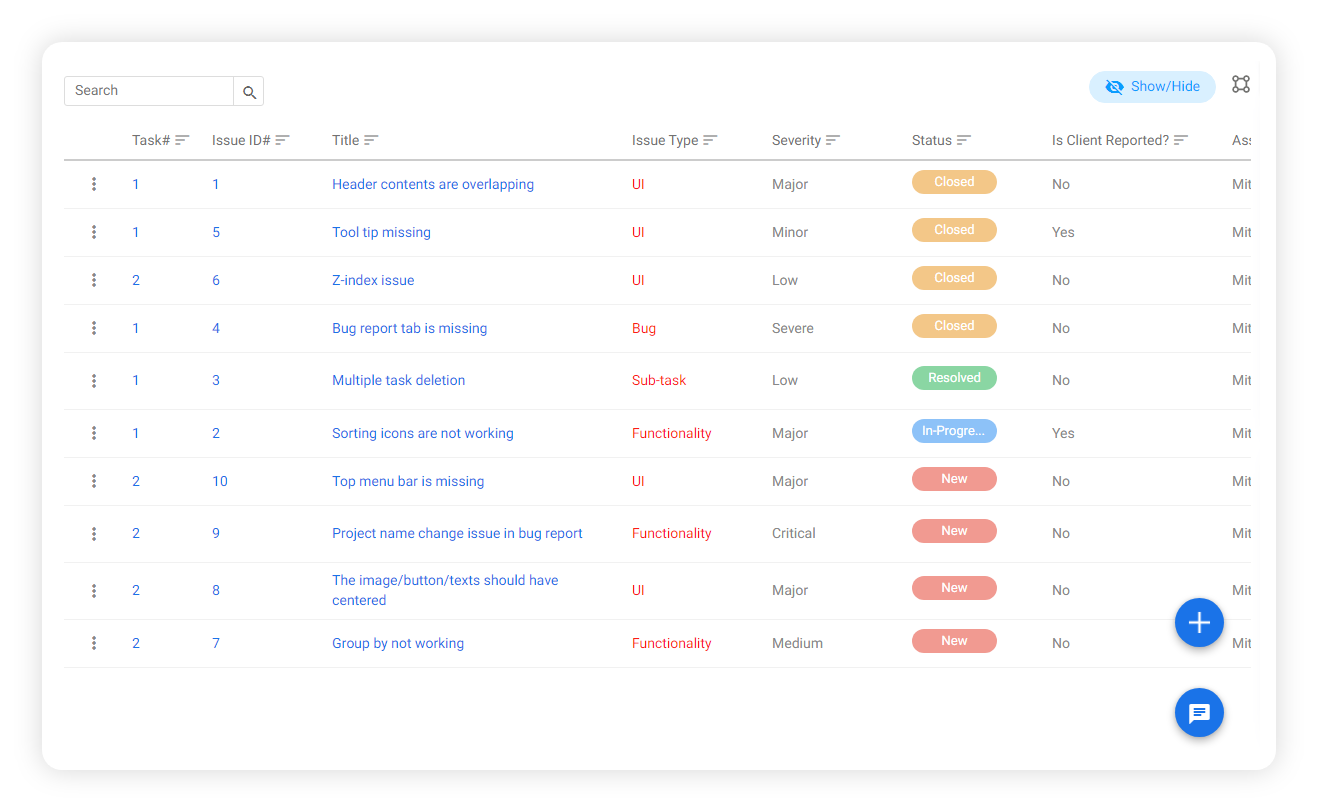
The Bug List Page:
Here the user can able to find the Detected Bug List as it shows bug name, Issue type, the bug severity, and the Status (Closed, In-Progress or Yet to start).
So the user would have a clear view of bug status for all projects with a single dashboard.
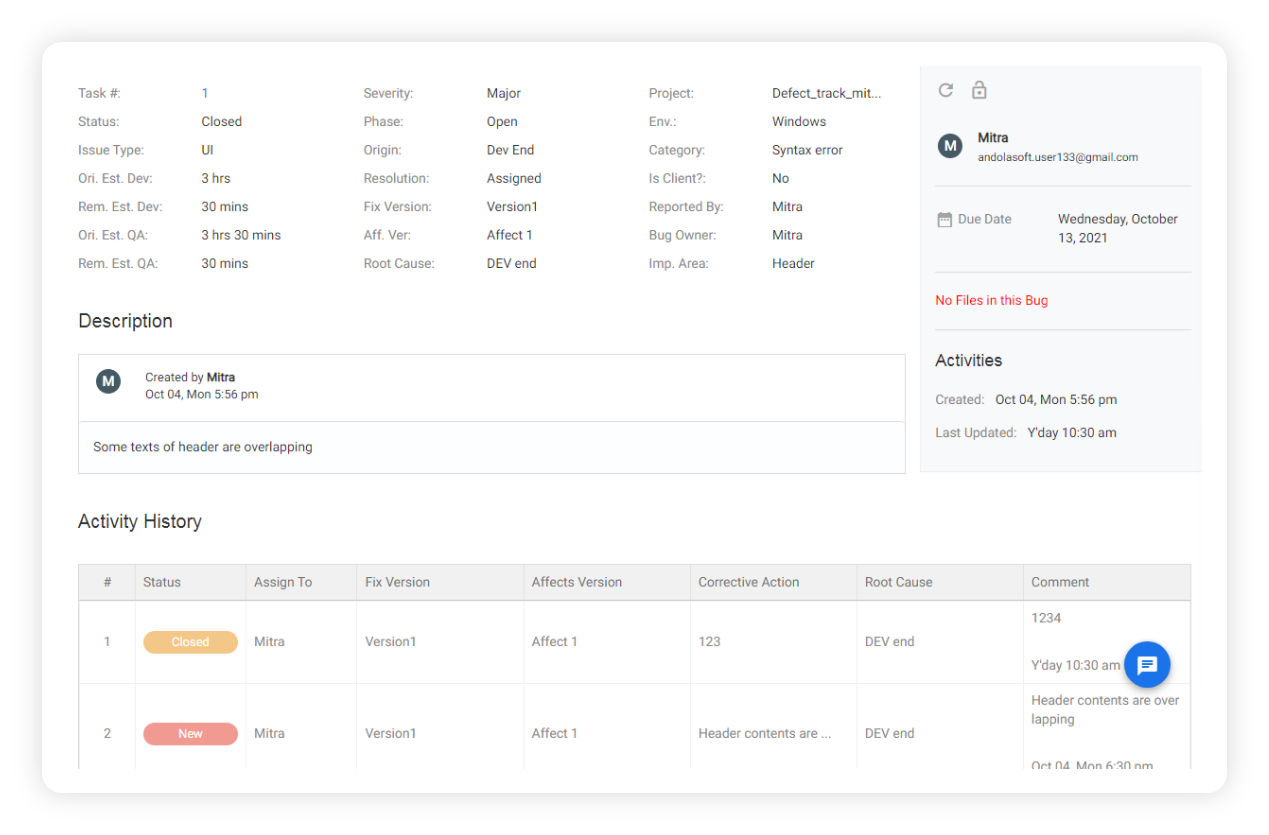
The Bug Details Page
On the bug detail page, the users are able to see all related information added to the bug.
Along with the bug details, the user can also find the bug handling activities in the Activity History section.
Bug List In Task Detail Page
Users can also see the bug list on the associated bug listing page.

The bug list can be found under the “Bugs” tab on the task detail page. Users can see the bug status as well as create new bugs on this page also.
Let’s Come To The Field Customization Part
As we mentioned before, you can customize the bug details fields for hassle-free monitoring.
Just go to the Bug Management page under the project setting at the right top menu.

Here you can find the fields to customize options at each tab.
You can create new fields and enable them and delete them instantly.
User Note: You can not delete any fields if they are in any Bug Details.
Coming Soon
1. Zapier Integration
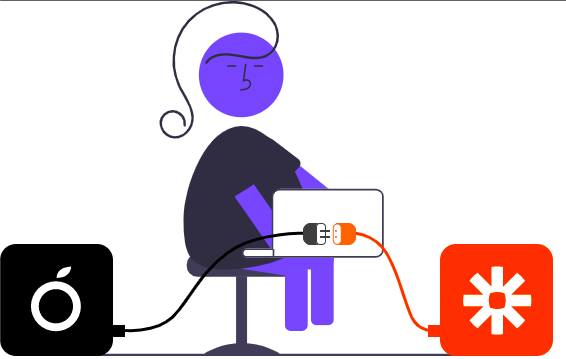
Zapier integration will let you connect to other applications so you can share your project task information based on when something happens.
2. GitHub Integration
Github Integration feature is already available in Orangescrum. With a new enhancement now you can see your development code repositories, branches, code pull-push request, and their status under a task.
3. SSO Integration
SSO integration will be another authentication experience for Orangescrum users. Users now can enjoy a modern digital experience as repeated logins are no longer required.
Conclusion
Bug tracking can be used in each and every stage of the development process, thus helping developers to be constant, be highly productive.
Adequate bug tracking processes safeguard the interests of the parties involved and increase the likelihood that the project will meet the scope established in the agreement.
In the end, you deliver what was exactly requested. Customers receive what they exactly wanted and both of these happen ON-TIME and WITHIN BUDGET!
Blog Source: Bug & Issue Tracking Released within Orangescrum
No comments:
Post a Comment